Showing posts with label Blogs. Show all posts
Showing posts with label Blogs. Show all posts
Friday
2
Friday
Andy Law
How to delete a blog on blogspot
Some people have asked me about how to delete a blog on blogspot or blogger. There are some reasons that make them want to delete a blog on blogspot, such as they don't want to blog anymore, or they just want to switch to another popular services like Wordpress, Tumblr, TypePad, and so on. However, some people don't know much about the benefits that Blogger provides, particularly you can make real money while expressing your interests. Anyway, the main topic I am going to talk about today is how to delete a blog on blogspot. To do that, you need to follow these steps:
1. In draft.blogger.com/home, click on the blog you want to delete
2. Click on Settings
3. Click on Other, and you will see something like this
 4. Click on Delete blog
It's done !
read more
1. In draft.blogger.com/home, click on the blog you want to delete
2. Click on Settings
3. Click on Other, and you will see something like this

It's done !
Wednesday
9
Wednesday
Andy Law
 In this tutorial, we will learn how to make an animation for the Recent Post gadget. As you can see an example here, it looks quite attractive, isn't it?. When the recent posts keep changing the positions, it can actually draw attention from visitors, thus more posts will be read, and visitors will probably stay longer on your site. You can see the instruction below:
read more
Animation for Recent Post Gadget

- Go to Page Elements / Layout >> Add a Gadget >> HTML/Javascripts
- Place this code into the content box
- SAVE
<style type="text/css"> #rp_plus_img{height:377px;} #rp_plus_img li {height:60px;padding:5px;list-style:none; background-color:#ffffff; border:solid 1px #000000;} #rp_plus_img a{color:#00000;} #rp_plus_img .news-title{display:block;font-weight:bold ;margin-bottom:4px;font-size:11px; text-align:justify; -moz-border-radius: 5px;} #rp_plus_img img{float:left;margin-right:14px;padding:4px;border:solid 1px #00000;width:55px;height:55px;} </style> <script type="text/javascript" src="http://ajax.googleapis.com/ajax/libs/jquery/1.4.2/jquery.min.js"></script> <script type="text/javascript" src="https://sites.google.com/site/unwanted86/javascript/recentpost.js"></script> <script type="text/javascript"> var speed = 1500; var pause = 3500; $(document).ready(function(){ rpnewsticker(); interval = setInterval(rpnewsticker, pause); }); </script> <ul id="rp_plus_img"> <script style="text/javascript"> var numposts = 5; var numchars = 0; </script> <script src="/feeds/posts/default?orderby=published&alt=json-in-script&callback=rpthumbnt"></script> </ul><small><a href="http://www.blogonblogspot.com/" target="_blank"><span style="color:#fff;">get this widget here</span></a></small>
Monday
15
Monday
Andy Law
How to add Twitter button to blogger
Twitter has become so popular with more than 200 million users, and about 350 million tweets per day. This trend has made most of bloggers approaching Twitter to gain more loyal readers by adding Twitter share button, and Twitter following button. Therefore, in this tutorial, I will share the tip about Twitter buttons for blogger. That is how to add a Twitter button to Blogger. You can follow some steps below:
1. Go to Layout / Page Elements >> Add a Gadget >> HTML/Javascripts (if you don't know how to add a gadget, you can see addind gadget to Blogger)
2. Copy and paste this code into the content box:
4. Save
There are some Twitter button examples here, you can use them if you'd like to.
You have learned how to add Twitter button to Blogger, and you may also like to learn how to add floating share button to blogger if you want drive even more traffic generated by your readers. Or just simply return to Blog On Blogspot to get the latest tips.
read more
1. Go to Layout / Page Elements >> Add a Gadget >> HTML/Javascripts (if you don't know how to add a gadget, you can see addind gadget to Blogger)
2. Copy and paste this code into the content box:
<a href='http://twitter.com/USERNAME' title='Follow me on Twitter'><img alt='Follow me on Twitter' src='your twitter icon URL' /></a>
4. Save
There are some Twitter button examples here, you can use them if you'd like to.
https://lh5.googleusercontent.com/_qf2_jbv7m4k/TdtSbcSMaQI/AAAAAAAAAGM/Vp43oTj-1Cg/110835_27721_128_twitter_icon.png

http://www.805county.com/wp-content/uploads/2011/01/twitter-icon.png

You have learned how to add Twitter button to Blogger, and you may also like to learn how to add floating share button to blogger if you want drive even more traffic generated by your readers. Or just simply return to Blog On Blogspot to get the latest tips.
Sunday
2
Sunday
Andy Law
 Sometime, Subscribe to: Posts (Atom) are quite annoying to you if you never need it. So, you want to get rid of this as soon as possible. I support you because I don't have to use it also. Now, I will show you how to remove Subscribe to: Posts (Atom). This tip is very simple, and it takes no more than a minute to accomplish as long as you follow correctly the steps below:
read more
How to remove Subscribe to: Posts (Atom)

- Go to Layout / Template (for new blogger) >> Edit Template >> Tick on the Expand Widget Templates box (remember to back up your template first)
- If you just want the Subsribe to: Posts (Atom) disappear for sometime, add this code just above the ]]></b:skin> :
- If you want to get rid of it forever, find this code , then delete it
- SAVE the template
.feed-links { display:none; }
<b:include data='feedLinks' name='feedLinksBody'/>OR
<b:include name='feedLinks'/>
Saturday
5
Saturday
Andy Law
How to change blog title tags
Today, I will show an esay tip that can make your blog post likely listed in Google search results. And this has been implemented by many bloggers already. But if you haven't done this, it would be useful for you. As you can see an example below for my blog:


Which one is better? The first one is absolutely the best because Google would read your blog post title first, then blog title (in the first one); and if your blog title is too long, it would be a big disadvantage for you if your blog is still displaying as the second example. Thus, now I will guide you how to change blog title tags in every blog post. You can see the instruction below:
read more


Which one is better? The first one is absolutely the best because Google would read your blog post title first, then blog title (in the first one); and if your blog title is too long, it would be a big disadvantage for you if your blog is still displaying as the second example. Thus, now I will guide you how to change blog title tags in every blog post. You can see the instruction below:
- You're in draft.blogger.com , go to Template
- Scroll down until you find Backup/Restore Template >> Click on it, then Download full template
- Click on Edit Template >> Tick the Expand Widget Templates
- Find this code (to find it, press Ctrl + F)
- Replace it with this code
- Click Save Template
<title><data:blog.title/></title>
<b:if cond='data:blog.pageType == "item"'> <title><data:blog.pageName/> |<data:blog.title/></title> <b:else/> <title><data:blog.pageTitle/></title> </b:if>
<title><data:blog.title/></title>with the following code
<b:if cond='data:blog.pageType == "index"'>
<title><data:blog.title/></title>
<b:else/>
<title><data:blog.pageName/></title>
</b:if>
Friday
0
Friday
Andy Law
How to make a contact form
For a large online business, they need to make a contact form by themselves. However, for most of bloggers, they want to use contact form already made from a service. This is because we would rather spend time on other things than wasting time on building such a contact form. Hence, I want to share some free contact form that you can get easily with you, and may steer you away the time wasters.
read more
 | MORE TO COME, SUBCRIBE TO GET THE LATEST UPDATE |  |
 |  |  |
0
Andy Law
How to add rss feed to blog
RSS Feed has become so popular because of its usefulness. It ties bloggers and their readers together as it updates the latest posts from a paticular blog and bring it to the blog's readers. For a normal readers, they just need to get the updates and read it themselves. On the other hand, for bloggers like as you and I, we can also use RSS Feed as a secret weapon to attract our readers by updating the latest interesting information from elsewher. If you just need to know how to add an RSS Feed icon to your blogger, you can see How to add Rss Feed icon to blog. Today, I will show you how to add RSS Feed to blog. Just follow the instruction below:
read more
- You're in draft.blogger.com, go to Layout >> Add a Gadget (a pop-up window will open)
- Scroll down until you see Feed >> Select Feed
- Add RSS Feed URL from your favorite blog (to get the URL, go to your target blog, click on the Feed icon, then copy the URL from your browser address bar)
- Click Continue >> SAVE


2
Andy Law
How to add rss feed icon
Today, I will show you how to add rss feed to your blog. This tip is quite simple, and easy to follow. You can see the instruction below. If you have any problems while doing this, please don't hesitate to leave a comment below this post, I will response as soon as I can.
read more
- You're in draft.blogger.com, go to Layout >> Add a gadget
- Find the HTML/Javascripts
- Copy and paste this code into the content box
- Click SAVE

<a href="YOUR FEED URL" target="_blank">You can get some RSS icon at naldzgraphics.net
<img src="YOUR RSS PICTURE URL" border="0" />
</a>
Thursday
1
Thursday
Andy Law
How to add read more to blog
Sometime you want to add a read more function to your blog home page because it doesn't look cool if you only have one (few) posts in the home page; and when visitors first time land on your blog, they just only see your very single post (if your post is too long). Does it look right to you? Actually, there are quite a few tutorials out there where you can learn to add the read more function to your blog. But in most of them, you have to use the tag <span class="fullpost"></span> every time you write a blog article. It's quite inconvenient, isn't it? Therefore, today I will show you how to add read more to blog just by one click. Just follow the instruction below:
 If you can't follow the instruction, just leave a comment below. I will sort it out for you. Best luck !
Thank you for dropping in this blog and reading my tip.
read more
- You're in draft.blogger.com, go to Template (on the lower left sidebar)
- Scroll down to the end >> Backup/Restore Template >> Download Full Template
- Click on Edit Template >> Tick the Expand Widget Templates box
- Press Ctrl + F , and type " ]]></b:skin> "
- Just right above it, copy and paste this code:
- Place this code between the ]]></b:skin> and </head>:
- In the search box, type " <data:post.body/> " or " <p><data:post.body/></p> " if you use custom template
- Place this code right below <data:post.body/> or <p><data:post.body/></p>
- Click SAVE Template
- To add read more: Just after your introduction paragraph, click on the "break" icon located above the content box like this.
/*READ MORE*/ .jump-link a { background: #ffff00; padding: 3px; color: #fff; } .jump-link a:hover { background: #000000; padding: 3px; color: #ccc; }
<!--READ MORE--> <b:if cond='data:blog.pageType != "item"'> <style> .post-body img { img { max-width: 100px; width: expression(this.width > 100 ? 100: true); float: right; } </style> </b:if>
<!--READ MORE--> <b:if cond='data:post.hasJumpLink'> <div class='jump-link'> <span style='float:right; font-weight:bold;'><a expr:href='data:post.url + "#more"'><span><a expr:href='data:post.url + "#more"'>Read more >></a></span></a></span> </div> </b:if>

Thank you for dropping in this blog and reading my tip.
6
Andy Law
 Hi all bloggers, have you thought of styling blog post background in your every blog post. If No, you don't have to continue to read this post, and you may discover some interesting posts inside this very lovely blog (for me i think :)). This tip is not too hard for a newbie, so don't think that you can't do it. All you need is that.... just follow some simple steps below:
read more
Different blog post background in each blog post
Hi all bloggers, have you thought of styling blog post background in your every blog post. If No, you don't have to continue to read this post, and you may discover some interesting posts inside this very lovely blog (for me i think :)). This tip is not too hard for a newbie, so don't think that you can't do it. All you need is that.... just follow some simple steps below:- You're in draft.blogger.com, go to Create a new post
- Click on HTML (there are Compose and HTML options on the top left corner)
- Copy and paste this code into the content box (if you just want to change the background color)
- Copy and paste this code into the content box (if you want to change the background image)
<div style="background:YOUR COLOR CODE GOES HERE; padding:5px 10px 5px 10px;"> WRITE YOUR CONTENT HERE </div>You can get color codes at html-color-codes.info.
<div style="background:url(YOUR IMAGE URL HERE) no-repeat;"> WRITE YOUR CONTENT HERE </div>Image background examples:


Wednesday
2
Wednesday
Andy Law
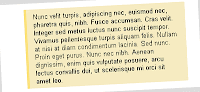 Block quote is commonly used to reference a long passage from other in a comprehensive and interpretative format. Block quote is alos used as an evidence for someone to prove something. As its ease of use, block quote has soon become popular over the internet. You can probably see it in most of blogs you have visited. For bloggers, we use block quote to share the codes as well. So how to make a block quote? To make it you just need to use the simple tag:
It will become like this:
read more
How to make a block quote
 Block quote is commonly used to reference a long passage from other in a comprehensive and interpretative format. Block quote is alos used as an evidence for someone to prove something. As its ease of use, block quote has soon become popular over the internet. You can probably see it in most of blogs you have visited. For bloggers, we use block quote to share the codes as well. So how to make a block quote? To make it you just need to use the simple tag:
<blockquote>
I wanted to say thank yous
To all of you who read my poems
And leave your comments and reviews
Which to me are precious gems
Gems that make me a better writer
See everything I think of goes into my poetry binder
And I only keep writing because of all of you
For helping me be better at what I do
<blockquote/>
It will become like this:
I wanted to say thank yous
To all of you who read my poems
And leave your comments and reviews
Which to me are precious gems
Gems that make me a better writer
See everything I think of goes into my poetry binder
And I only keep writing because of all of you
For helping me be better at what I do
Sometime the block quote default design doesn't look right to you, so you can customize it by reading how to customize a block quote or return to the home page to get the latest tipsTo all of you who read my poems
And leave your comments and reviews
Which to me are precious gems
Gems that make me a better writer
See everything I think of goes into my poetry binder
And I only keep writing because of all of you
For helping me be better at what I do
3
Andy Law
How to customize blockquote style
In this tutorial, I will show you how to customize blockquote style in blogger. I will do all of these changes in CSS style. By using CSS, we can change the look of the blockquote such as changing margin, background, colour, padding, etc..So, you just need to follow the steps below:
If you use custom template, and cannot find it, search for " .entry blockquote " ; it looks very similar with the codes above.
I have a few examples, so just replace the codes in Step 2 with the code in each example

EXAMPLE 2:

EXAMPLE 3:

EXAMPLE 4:

Enjoy !
read more
- Go to Layout >> Template >> Download full template >> Click on Expand Widget Template
- Press Ctrl + F, search for " .post blockquote ", you will see something like this:
.post blockquote {
margin:1em 20px;
}
.post blockquote p {
margin:.75em 0;
}
If you use custom template, and cannot find it, search for " .entry blockquote " ; it looks very similar with the codes above.

.post blockquote {
margin: 1em 3em;
padding: .5em 1em;
border-left: 5px solid #fce27c;
background-color: #f6ebc1; }
.post blockquote p {
margin: 0; }
EXAMPLE 2:

.post blockquote {
margin: 1em 20px;
padding-left: 50px;
background: transparent url(https://blogger.googleusercontent.com/img/b/R29vZ2xl/AVvXsEiNyJ7KaCHUS1KsWjj0UeD0359PmtfB9-fTMkWq4ZbpGksE1V9kV8wigbCT8kx66iD2FVvQa7TXj8fGg0XMd3Iyn-cVeAYm1aeNDhatFitC7Jfg9ZeTixEs8XOtF1YCQMlE3yjPYo9dKCDN/s1600/Next-icon.png) no-repeat; }
EXAMPLE 3:

.post blockquote {
margin: 1em 2em;
border-left: 1px dashed #999;
padding-left: 1em; }
.post blockquote p:first-letter {
float: left;
margin: .2em .3em .1em 0;
font-family: "Monotype Corsiva", "Apple Chancery", fantasy;
font-size: 220%;
font-weight: bold; }
.post blockquote p:first-line {
font-variant: small-caps; }
EXAMPLE 4:

.post blockquote {4. Click SAVE and check result. If you don't know how to add a blockquote to your post you can see How to make a blockquote
background: #ffffff url(http://i44.tinypic.com/slh4yu.jpg);
background-repeat:no-repeat;
background-position:top center;
margin: 6px 6px 6px 6px;
padding: 8px 36px 8px 40px;
font-size: 14px;
line-height:1.4em;
}
Enjoy !
1
Andy Law
 Today, I am going to walk you through how to customize next and previous post link. As we know, there are "Older Posts" and "Newer Posts" located in every blog which can make readers stay longer in your blog. But, is it attractive enough to draw visitors' attentions? I would recommend you change this. It won't take long to customize the next and previous links, so just follow the steps below:
read more
How to customize next and previous post link
Today, I am going to walk you through how to customize next and previous post link. As we know, there are "Older Posts" and "Newer Posts" located in every blog which can make readers stay longer in your blog. But, is it attractive enough to draw visitors' attentions? I would recommend you change this. It won't take long to customize the next and previous links, so just follow the steps below:- Go to Layout >> Template >> Download the full template >> Click on Expand Widget Templates
- Press Ctrl + F, and find this code:
- Replace it with: NEXT POST or this code if you want to show an image:
- Find this code:
- Replace it with PREVIOUS or this code:
- Find this code: (note: there are two similar code, use the first one)
- Replace it with HOME PAGE or
<data:newerPageTitle/>
<img src="YOUR--IMAGE--ADDRESS--HERE" />We've added a NEW POST link, now we'll change the PREVIOUS link
<data:olderPageTitle/>
<img src="YOUR--IMAGE--ADDRESS--HERE" />Now we'll do the same for the HOME PAGE
<data:homeMsg/>
<img src="YOUR--IMAGE--ADDRESS--HERE" />
https://blogger.googleusercontent.com/img/b/R29vZ2xl/AVvXsEhwMDEjxzeoNc2g9fJAivTZWBB2sHc9HZR-SPo9lqhyphenhyphennrWGDZLUdAnQw_3S9eV7bHR0cbZGEA8a_FhK6fhcTBAQGw9lABrPf_8Wen-YIXrlbtC74wtrvCA1Jvc22sRpK_tbSYSMleJKSY6J/s1600/Home-page.png

https://blogger.googleusercontent.com/img/b/R29vZ2xl/AVvXsEjFQdldoHXW79qjR7r9WpyR_mw5t67PkZIHQx5Zb2LyT3Suy_9CgCME_HFiqqrvt0KQhHhhsyT4iGFTqb4hvVcvIP_P0K48WDP1jjnW4STdAGFa0FeKWS9qOeiwgKxoMThgGcdQ-f9PS7Uy/s1600/Next-page.png

https://blogger.googleusercontent.com/img/b/R29vZ2xl/AVvXsEhYH0yBkxocqtN8FJ-ZrH9lu86lokq1N1WgEGyEKyXLXGqjhpG6ww5XRUzlzuSzBk9recet6tBgjwjsUTBeBPHegfpkHEA9KFgCC5MSCrDsr5tpk0c8NVSOpmsX4t2jqo0BtznpTe0f2eP-/s1600/Previous-posts.png

Tuesday
1
Tuesday
Andy Law
Adding gadgets to Blogger
Blogger has been well known since it was launched by Pyra Labs in August 23, 1999. Blogger has millions of active users which include you and I. Moreover, more and more new users have switched from other services to Blogger. Therefore, I would guess some of you may not know some of the basic tips in Blogger. This thought has encouraged me to walk you through some basic tips. Note: if you're an blogger guru, you shouldn't see this post. The first tip I want to show you is that adding gadgets to Blogger. If you want to know the latest tips in this blog, just simply to the home page of Blog on Blogspot. To add a gadget to a Blogger blog is quite simple, so it wouldn't take you much time. You just need to follow these steps:
If you're using the Old Blogger with its ugly blue skin, you can follow this tutorial.
If you want to use Blogger's new cool design, you can follow the steps below:
I hope you will enjoy blogging in Blogger. Go to the front page to learn more
read more
If you're using the Old Blogger with its ugly blue skin, you can follow this tutorial.
If you want to use Blogger's new cool design, you can follow the steps below:
- Log in into your Blogger in draft.blogger.com
- Select your Blog by clicking on the Blog name, you will see something like this
- Click on Layout (on the left sidebar)
- Click on Add a Gadget (where you want to add your Gadget in you blog); a pop-up window will open
- Choose your a Gadget you want to add (if you cannot find the gadget you want to add, just the search box at the top right corner). I've listed some of the best Gadgets in Best Gadgets for Blog, so you can see it as an idea.
- For example, I will choose Follow by Email Gadget
- Click Save, then Click SAVE arrangement (on the top right corner)


I hope you will enjoy blogging in Blogger. Go to the front page to learn more
1
Andy Law
The main purpose of creating a blog is to let people readind your blog. But how can your blog be visible to readers all over the world. The easiest way is that you need to let search engines such as Google, Yahoo, Bing, etc.. know your blogs first as people tend to type in a search box whenever they want something. For now, I just focus on Google as it's the most popular search engines in the world. So, how to add your blog to Google?. To do that you need to go to Google directory, then fill the form and click Add URL button. You're done. I wish your blog will be soon indexed by Google. You can go back to Blog on Blogspot home page to get the latest tips.
 read more
How to add blog to Google
The main purpose of creating a blog is to let people readind your blog. But how can your blog be visible to readers all over the world. The easiest way is that you need to let search engines such as Google, Yahoo, Bing, etc.. know your blogs first as people tend to type in a search box whenever they want something. For now, I just focus on Google as it's the most popular search engines in the world. So, how to add your blog to Google?. To do that you need to go to Google directory, then fill the form and click Add URL button. You're done. I wish your blog will be soon indexed by Google. You can go back to Blog on Blogspot home page to get the latest tips.

50
Andy Law
How to add slideshow in blogger
Hi guys, someone has asked me how to add slideshow in blogger a while ago. Therefore, now I want to share my answer to anyone who can visit my blog. This tip is not too hard, so I would expect that you can get to know how to add slideshow in your own blog easily. All right, let's do these steps:
Note: You can place your slideshow anywhere in your blog by copying the slideshow code into a Gadget.
You can go back to Blog on Blogspot home page to get the latest tips
read more
- Go to Google Picasa (you probably have a google account, don't you?)
- Upload your photo into a album that you want to make it as a slide show in your blog posts
- After you have uploaded your photos into a specific album, click on the album
- Click on " Link to this album " (located in the right hand side)
- Click on " Embed Slideshow "
- Copy the code in the yellow box.
- Now, you've already have the code, Go to create a new post
- Paste the code into the content box where you want your slideshow to be displayed
- Click on Preview to check the result, then Click on Save or Publish.


Note: You can place your slideshow anywhere in your blog by copying the slideshow code into a Gadget.
You can go back to Blog on Blogspot home page to get the latest tips
Monday
1
Monday
Andy Law
Embedding YouTube Code To Blog Posts
Today, I'm going to guide you how to embedding Youtube code to blog posts. It would take you a few minutes as long as you follow exactly the following steps:
You're Done
You can also return to the home page to see the latest posts
read more
- Go to Blogger and click New Post
- In the Post section, you will see Compose and HTML, click on HTML. (actually, you can use any)
- Open Youtube.com in a new window
- Select your video
- Click on the Share button
- Click on Embed
- Copy the code
- Paste that code to your post
- Click Preview to see the result, then click Publish or Save
You're Done
You can also return to the home page to see the latest posts
Subscribe to:
Posts (Atom)


